Pages

.

New Colorful Pillow Cases in my Shop.

Hello my dearest readers, I just wanted to let you know that I added lots of new pillow cases to my shop. Most of them have floral patterns and they are super as a gift for Christmas or for your own cozy corner. :)
You can find them all here in my shop.
Happy Weekend!
Lu
(P.S.: Today I'm celebrating a little Crafty Christmas party with a few of my favorite blogger pals, can't wait to tell you more and to show you photos!! :))
reade more... Résuméabuiyad

We loooove Avocados!!

N and I... we both love our Avocados. In any form. We eat them cut-in-pieces-with-salt-sprinkled-over, as guacamole, in our sandwiches and our salads!

They are healthy, tasty and colourful. Here are some ways we use them -

Guacamole - We eat a lot of it, a LOT!! Give a lady her chips and dip and she will be very happy and grateful (the lady being me). I use a simple version of it - some diced onions (whichever ones I have at home - red or white), some diced tomato, crushed or finely diced garlic, chopped coriander, some paprika, salt and lemon. It is super fresh and flavorsome. Grab some chips - the fried, baked, unhealthy, healthy, any kinds and go dip!!

Photo from Flickr under a Creative Commons License from here

Sandwich - As a quick and healthy snack for those mid morning or evening hunger pangs. We use guacamole or plain fresh avocado smeared onto a slice of bread/toast, topped with a slice of tomato and sprinkled with salt and pepper on top.

Salad - A few red kidney beans, diced tomatoes, sweet corn, diced cucumber, and diced avocados.  Mix together, add some salt and pepper and a lil bit of balsamic or red wine vinegar and olive oil. Keep it in the fridge for a bit, tastes better cold. Perfect for those summer picnics too


Enjoy your veggies and go get some avocados!!!


reade more... Résuméabuiyad

How much I love my Christmas decor.

Hey! :) Eeeeks, it's time to share a part of my Christmas decor.
Each year we decorate our home in red, green and white and we use natural decor elements like cinnamon sticks, pine cones and fir. I love those classical elements for Christmas decor and we are also using them this year, but only in Flo's room (which is also our living room) and in the kitchen. For my room, I wanted to make it diffently this year, I decided for bright colors and a color concept which matches the overall look of my room.

I went out into the woods and collected lots of branches which I painted white. I put them into a vase and decorated them with colorful Christmas bulbs, I love all the contrasts and that everything is so bright and beautiful to look at.
How do you like my decor? :)
I will also sew a tiny bunting in turquoise and pink for my room and maybe I'll also show you a few photos of the classical decor in the other rooms. :)
Lu
reade more... Résuméabuiyad

Patchwork Birthday Present.

Heyyy! :) Here's one of my latest sewing projects, I couldn't wait to share it any longer. It has recently been my mother's birthday and I wanted to make something special for her, something which is useful and still pretty.
It has been the first time I have been sewing a patchwork blanket and it was lots of work, it took me two days, but was lots of fun and totally worth the effort. My mother loves it and I'm super proud of the result.
I chose various kinds of floral fabrics in light colors and I made several rows in different sizes to make the top side of the blanket interesting and nice to look at. The back of the blanket is made of polyester so that my mother will be kept warm. :)
Have you ever been working on a huge patchwork project? :)
Lu
reade more... Résuméabuiyad

How to make (Christmas) rubber stamps yourself.

Hello everyone! I have often been asked about how I make my stamps and here's a DIY for you. Making stamps yourself is super easy and you can grow your own collection of stamps for various occasions.
You need:
- An eraser / rubber
- An inkpad
- A pencil
- A cutter set for linoleum
1. Draw your motif onto an eraser. 2. + 3. Choose the cutter with a small width. 4. Use it to cut out the outlines. 5. Choose a cutter with a bigger width. 6. Use it to cut out the areas between the pencil lines.
Try out your stamp and see of there's anything you want to correct. 
You can make all different kinds of stamps and for example use them to embellish your Christmas mail. :)
Have fun,
Lu
reade more... Résuméabuiyad

DIY: Embellish jars for Advent candles.

Hello! Here's something I already posted last year, but because this idea is so easy and pretty to look at and because many of you haven't been knowing my blog at that time, I thought I could share these pretty jars again and tell you how to make them.
Supplies needed:
- Empty jars
- Gift wrapping paper and some paperboard scraps
- Fabric scraps
- (Paper) doilies
- Wool and ribbons
- A hot-glue gun
- 4 tealights

It's super easy: cut out paper or fabric in the size of your jars and wrap it around them. Use ribbons, wool and the hot-glue gun to attach everything to the jars and embellish them with tiny bows and paperboard numbers. The varieties are endless, it is made really fast and a super pretty last minute gift!
The only thing you have to pay attention to is that your jars shouldn't be too high and narrow, bacause otherwise it will be difficult to put the tealights inside and to ignite them.
Have fun! :)
Lu
reade more... Résuméabuiyad

Handmade Advent calendar, part two.

Hello everyone! :) Some days ago I posted photos of the pretty Advent calendar I made for Flo and here's a second one, a calendar I made for Anja. :) It was soooo cute how happy, thankful and surprised both of them were and it was totally worth the effort!!! :*
For Flo's calendar I chose red, green, white and cream but this time, I wanted to make it a bit more girly and also used turquoise and pink for Anja's version.
Like it also did it with Flo's calendar, I sewed gift bags, wrapped tiny presents in packaging paper and also used white envelopes and paper bags which I embellished with handmade Christmas stamps. I used clothes pins and washi tape (courtesy of modes 4u, thank you! :)) to attach the numbers which I wrote onto paperboard I punched out.
What is more, I also added some cinnamon sticks and a candy cane.
So happy about how prettily it has turned out! :)
Because it was a gift and I couldn't simply walk into Anja's house and nail the calendar onto her walls without ruining the surprise, I was thinking about another solution and then I decided to put everything into a little box which I had decorated with wrapping paper. I love it!

Are you making any Advent calendars this year? ;)
Lu
reade more... Résuméabuiyad

Support my friends: new e-course and creative competition.

Happy Sunday everyone! Today's post is not about me or my own creations, but it's about two lovely ladies who I want to support and who have become more than just blogging friends of mine. They are super excited about their current projects and I'd love you to support them if you like their ideas as much as I do! :)

My dear friend Stef - you might know her as the author of the blog Magnoliaelectric - has just released her first e-course (in German) which is called "blog what you love", a course about blogging with lots of personal advice and experience, filled with so many detailed information and written with passion and lots of knowledge.
If you want to get to know more about the course and the awesome concept behind it, visit her blog and read about all the details she has just published. :)
The second thing I want to tell you is that my dear friend Stefanie (the author of the awesome blog Squeaky Swing) is being nominated for this month's best creative blog on Brigitte.de. She submitted the cutest DIY project ever, embroidered mittens which look like a cat, simply adorable. :) If you like her blog and project as much as I do, you can click here and vote for her idea in order to make her the monthly winner. :)

Thanks so much for reading, wish you a lovely Sunday!
Lu
reade more... Résuméabuiyad

New Christmas bags in my shop.

Hey everyone and happy weekend! :) As most of you who have been reading my blog for a long time already know: I love Christmas and the holiday season, it's my favorite seasons ever! :)
To be well prepared, I sewed many little gift bags, not only for my loved ones, but also for my shop.
You can find all of them here in my DaWanda shop. :)
Happy shopping!
Lu
reade more... Résuméabuiyad

My 2nd guest post at ShopHealthy.in

Here is the 2nd guest post I wrote for ShopHealthy.in's blog - 5+ A Day.
The 1st one was a recipe for Oatmeal and walnut cookies - mentioned here. This new post is about getting 5+ servings of fruits and veggies in your daily diet and using all the food colour groups!

I love colour in all aspects of life, except my wardrobe maybe... that has a lot of black, which I am desperately trying to change. Uh, well digressing aren't we? Let's get back to the point. I believe food should also be visually appealing to tickle those taste buds and get all the senses activated! Food well presented beckons to me, in a way I know and love.

So go on read the post and incorporate some colour into your meals!!
Leaving you with this vivid image of simple yet very flavorful ingredients for a quick pasta meal which covers 3 of your colour segments :)


reade more... Résuméabuiyad

Handmade Advent calendar.

Hello! :) Here's the Advent calendar I prepared for Flo as a big surprise (and he loves it!! :)).
I decided to use a mixture of packages, envelopes and little bags so that I was able to find the perfect packaging for each little present. :) What is more, I didn't just want to hang all the presents on the wall, I rather wanted to display all packages on several levels, that's why I hung up a cord, added the branch with the Christmas tree decor elements and put all the other presents onto his chest of drawers.
I made the number tags with a puncher (inspired by Anja's idea :)) and wrapped every single present. The paper bags are made prettier with handmade stamps and the fabric bags are handmade. :)
How do you like this Advent calendar display?
It's perfect for Flo's room, because its main colors are white, red and green and I wanted the calendar to match his room's color concept. :)
Can't wait to see him open the first one soon! :)
Lu
reade more... Résuméabuiyad

New photos from my everyday life.

Colorful outfit. // Cupcake heaven. // Meeting my dear friend Stef in Berlin, it was so good seing her again! :* // The blue bus. // Outfit of the day.
Flo made a love cake for me!!! :)) // The Donots, my favorite band ever!! / My colorful closet. // Fall colors. // Spending our Sunday in the woods.
Baking evening. // Flo made homemade pizza. // My favorite coat. // Fabric stack. // Mustard. // Mogliiiii with me in the kitchen. :)
Colors! // I made a chocolate cake for a girl's crafternoon. // Lights in our bed's corner. // Handmade brooches. // Crafternoon with Anja, Sina & Kat. ;) // Sunday brunch.
He's everywhere I go. // Fall outfit. // Floral bedding. // My beautiful room.
Handmade, green crochet accessoires. // Handmade stamps. // Little Christmas collection. // Daily outfits. // He's so greedy!
Baby, it's cold outsite. // Mogli is doing yoga. // Hello! // Sleeping baby. // Siiina and her cute kitty! // Awww, he likes me!
Crafty afternoon. // An Advent calendar for Flo. :* // Home sweet home. I love our flat! // Walking the dog. :)

I wish you a colorful day!
Lu
reade more... Résuméabuiyad

Christmas Stockings Shop Update.

Hello and happy Sunday, dear readers! :) Totally looking forward to Christmas and the holiday season, I have already sewn lots of colorful Christmas stockings for my shop which you can either use for home decor purposes or to fill them with chocolate and little presents for your loved ones. :)
You can find all those stockings here in my shop (and some have already been sold :)). :)
Which one do you like best?
Enjoy your Sunday!
Lu
reade more... Résuméabuiyad

Chocolate Cake Recipe.


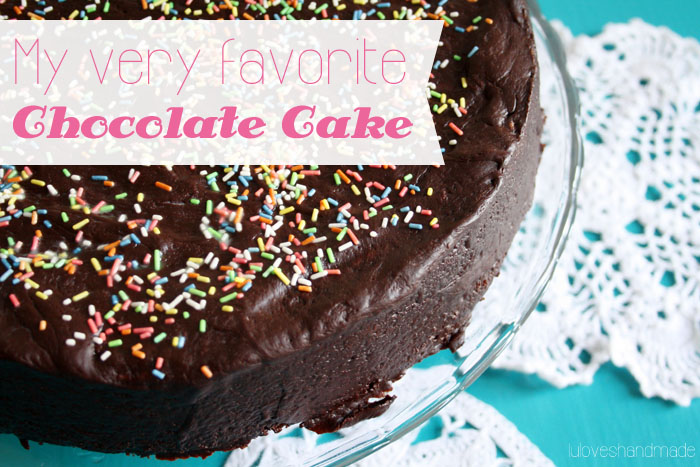
Hey everyone! Here's the recipe for my very favorite chocolate cake, the cake my mother has always made for me during my childhood, I love it so much. :)
Happy baking! :)

What you need:
A spring form pan for your cake
8 eggs
210g / 7,41oz butter
200g / 7,05oz sugar
140g / 4,94oz dark chocolate
110g / 3,88oz breadcrumbs
120g / 4,23oz ground hazelnuts
½ package of baking powder

Ingredients for the icing:

40g / 1,41oz butter
70g / 2,47oz chocolate
4 table spoons of sugar
4 table spoons of water
Sprinkles (optional)
Take the butter out of the fridge the evening before you start baking (or use margarine)! :)
When you start baking, separate the egg yolk from the egg white.
Beat the egg whites in an extra bowl until they are stiff. Next, put the butter, the 8 egg yolks and the sugar into another bowl and stir the mixture really long until everything is totally creamy.
Next, melt the chocolate and add it to your dough. Also add the breadcrumbs, the ground hazelnuts and the baking powder. Finally, carefully fold in the stir egg whites; this makes your dough extra soft!
Bake the cake for about 60 minutes at about 180°C / 356°F; insert the baking sheet with the cake on it into the lower third of the oven.
Afterwards, let the cake cool down for a while and then make the glaze.
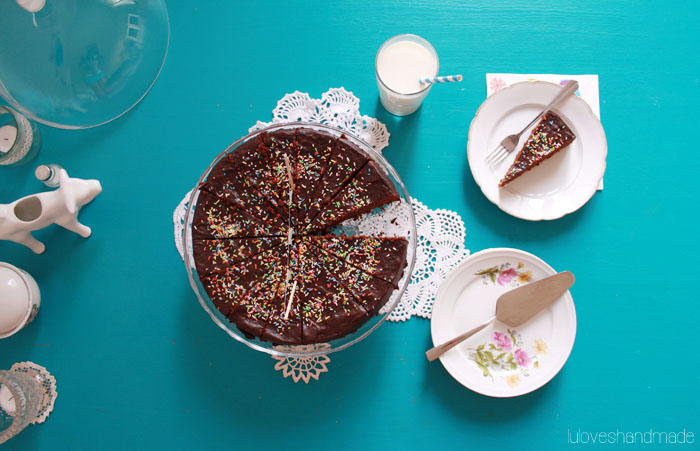
Therefore, use a small pot. Put all ingredients for the glaze into it (butter, chocolate, sugar and water) and carefully melt everything while you are stirring. Afterwards, directly pour the glaze over the cake and spread it all over it. :) After the glaze has cooled down just a little bit (but is still warm), distribute some colorful sprinkles all over the cake to make it even prettier. :)
Happy weekend!
Lu
reade more... Résuméabuiyad