Pages

.

Showing posts with label tutorial. Show all posts

My 100th post! Bird wall art - Tutorial

Yay!! This is my 100th post and it feels great writing it :) Wait, lemme quickly check the fact again before I make an announcement in error..... Yes it is! I am so HAPPY. When I started the blog I couldn't have imagined today and now that I am here I feel inspired and all the more eager to reach the next milestones :)
And the announcement - Keep a look out for the 100th post giveaway coming soon!!

For this post you can enjoy these birdies sitting on trees.


I was very inspired by Becca from Blue Cricket Design. She made this bird wall art here. Check it out, it even has a video of her TV interview explaining the process. I have been trying to attempt this since ages and finally could complete it last week. My guest bedroom walls were bare and with family coming down for a visit it was the perfect time to get this done.

The raw materials used are - 2 canvases of the same size (mine were 11x14), fevicol, permanent markers in black - one thin to outline and one thick tipped to fill in, a pencil, the local yellow pages directory (which was free by the way) and printed bird images off the internet.


I chose the pages from a yellow pages telephone directory. Like Becca suggests you can choose any material - newspaper, pages from an old book, scrapbook paper, gift wrapping paper etc. Let your imagination go wild!
I started with mixing 1 part of fevicol with 1.5 parts water. You can thin it out further if it seems too thick. Thin is easy to spread with a brush.  Next I tore out random pages out of the telephone directory and spread the fevicol mixture on one side with a brush. Then I stuck the pages on the canvas in any shape and manner that you want to. Random is good. Overlap, overlay and cover the sides of the canvas too.
Once both the canvases were done I kept them overnight to let them dry out completely.


The next day I started with drawing branches on the canvas freehand with pencil. Make sure that you continue the branch from one canvas to the other to get the illusion of one single branch across. Once the branches were done I outlined them with the thin marker.


Then filled them in with the thicker marker.


Once the branches were all done I placed the bird images at different places and traced the outlines. For the bird images I googled birds on the internet and printed them out. You can also stick the images onto a harder paper like card stock and cut along the outline. This will make it easier to transfer onto the canvas.
Then I filled in the birds and added the details like leaves and small branches. After this I coloured in the images one last time to ensure an even colour.


It looks lovely on the guest room walls, haven't been able to take pictures of that yet. But here are some more pictures. I already got some great reviews from the guests :)


Linking this in to Patty's Weekend Wrap Up!
reade more... Résuméabuiyad

Butterfly artwork in picture frame - Tutorial

Let the curtains rise!! [Drum roll please]
I was surfing around on one of the blogs on my blog roll - Blue Cricket Design and liked an idea where Becca uses a silhouette of birds across a range of products - to decorate a book cover, make a photo frame wall art and a canvas wall art. I was working on the bird canvas wall art when I decided to decorate the photo frame on my console table as a quick mini-project. So I chose some butterflies instead of birds.

I had this beautiful frame (gifted by a friend on Christmas some years back) and a very pretty Japanese scrapbook paper at home.


I googled for butterfly images and found some pretty ones.
via  


I traced the images from a print out onto card stock paper  which is thicker and used that to trace onto the Japanese scrapbook paper. You can draw freehand if you are those talented kinds ;) I used a couple of different sizes of butterflies.


I used a thin permanent black marker to outline the images and then a thicker black one to fill them in. Once all the butterflies were done I coloured them with the thick marker once again to even out the colour and give it a thicker sheen.

And here is how the frame looks like -


I love it after the makeover and it looks great on my console table :)

I am linking this to Weekend Wrap Up on Colours Dekor! Have a great week ahead.

Update - I am also linking this to Show and Tell Wednesdays on Blue Cricket Design.


reade more... Résuméabuiyad

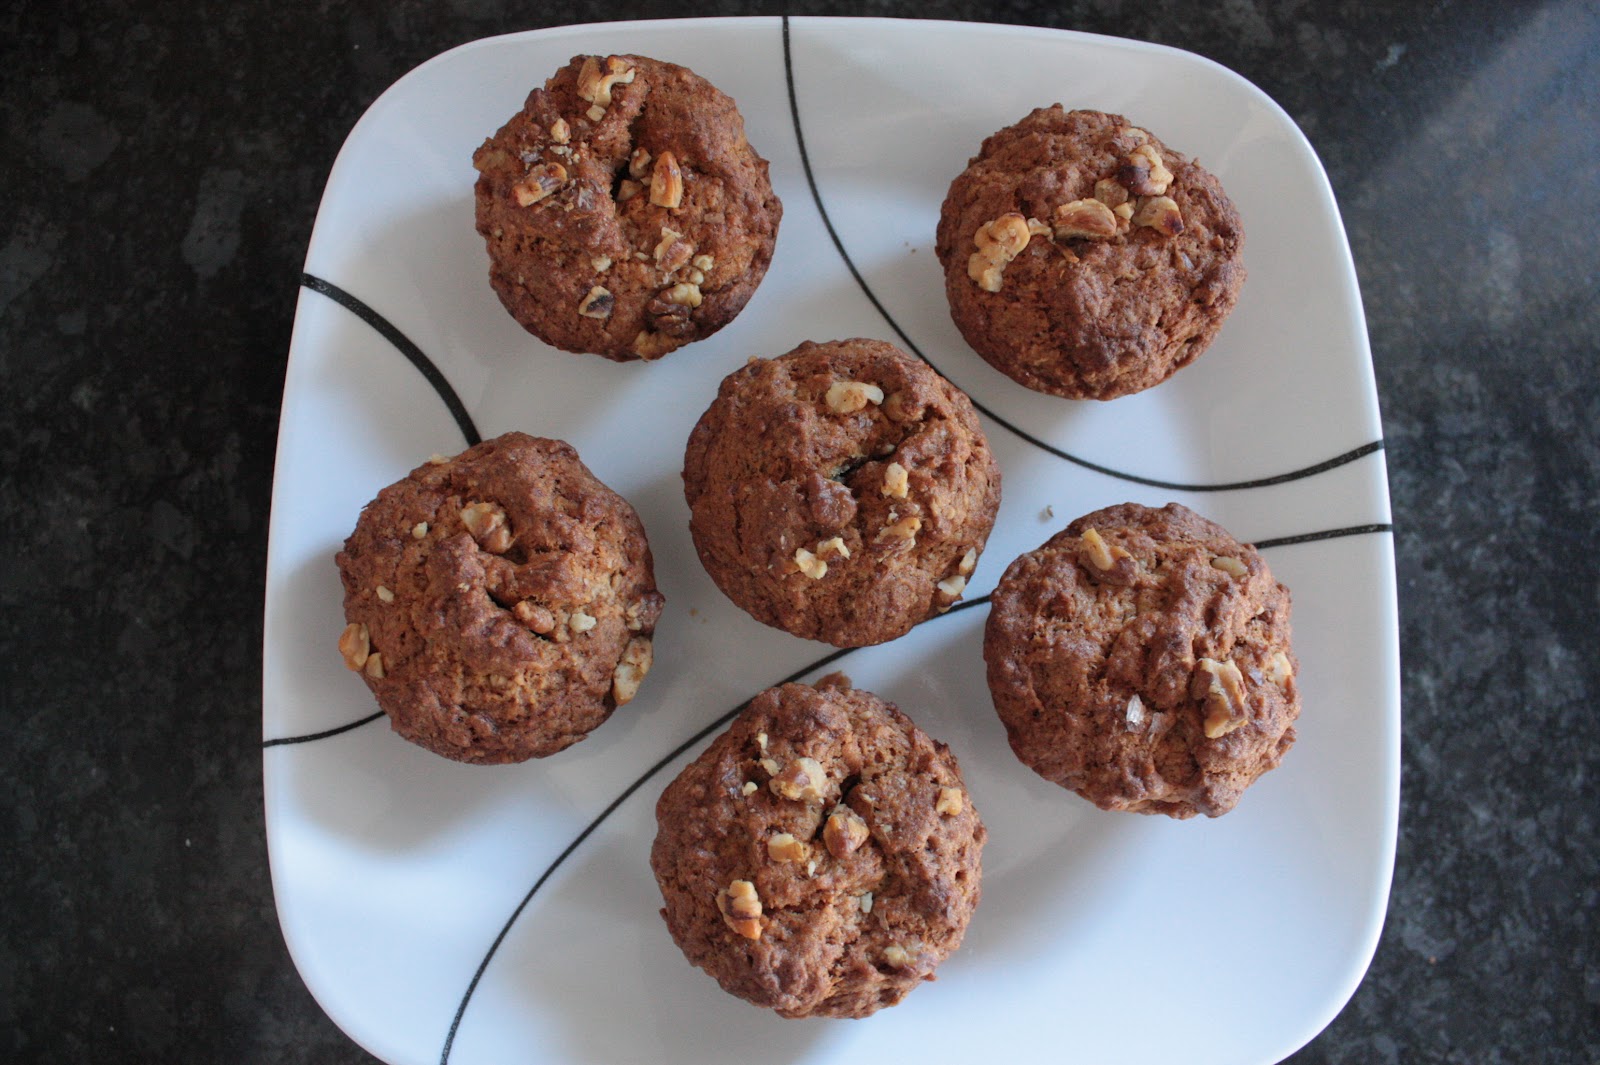
Easy and Quick Banana Walnut Muffins

Of all the different areas under cooking I love baking the most. Regular daily cooking doesn't excite me, at all. But cooking for parties, making snacks or sides or baking gets me into action big time!
Ever since we have moved back to India from the US I have been slow on the baking front thanks to the lack of a good oven. But amongst one of the few things I have managed to bake are these banana walnut muffins.
These are the easiest, awesome-est, quickest and yummy-est muffins ever (apart from blueberry muffins maybe).

I had stumbled on the recipe at Saffron Hut long time back. I love her recipes and have tried my hand at a lot of them.

Here is the recipe that I use (I made some changes)! This makes 12 regular size muffins.
Enjoy eating these.


Ingredients: 
3 ripe regular size bananas - the riper they are the better
3/4 cup sugar (powdered sugar works best)
1/3 cup melted butter (unsalted)
1 tsp baking soda
1 tsp baking powder
1/2 tsp salt
1 1/2 cups of flour (all purpose/maida)
1 tsp of vanilla essence
1/2 cup of walnuts, chopped/crushed


Method:

Preheat oven to 375 degrees F or 200 degrees C.
Chop/crush walnuts.
Line muffin pan with muffin paper cups (I use the re-usable silicon muffin mould in my microwave convection oven).
Mash bananas well in a bowl. 
Add sugar and melted butter.
Add the vanilla essence.
Sift the dry ingredients one by one into the sugar, butter, banana mixture.
Add some of the chopped walnuts leaving a few to garnish.
Mix just enough using a spatula to bring everything together.
Fill muffin cups about 3/4 to the top.
Sprinkle with remaining chopped walnuts. 
Bake for 20 minutes or till the muffins are golden brown (the batch in the pictures above turned a tad browner than usual but they were still yummy inside).

I am linking this to Becca's Show and Tell Wednesdays.

Show and Tell Green

reade more... Résuméabuiyad

Anniversary gift

S and I recently celebrated 5 years of being married! Its been a beautiful 5 years. I love him as much as I did when we were dating. My heart still skips a beat when I see him turn down the corner, it melts like butter when he holds me (ok maybe not like butter but it does become a li'l mushy) and I miss him when he is away, even for a day!

In addition to his "demand" for a 2nd remote for his Wii Sport as an anniversary gift I decided to make something (well not exactly make make) personal for him. Something to mark this milestone of 5 years.

I was browsing through Blue Cricket Design and came across a wall art by Tammy of She Wears Flowers. She had created an eye test chart art for her anniversary. I  loved the idea and this looked like the perfect thing for the occasion. Nothing too mushy and yet personal!!

So I went ahead to the website that allows you to make a custom eye test chart for free. It also allows you to make custom road signs, receipts, prescriptions and more :). Once I customized the letters on the chart I saved the image file to my laptop.


I opened the image file in Microsoft Paint to erase the last line of text at the bottom.


When I went to my local Printo store the guy said the resolution was really low on the image file and it wouldn't look great when printed. So I downloaded the Photoshop WORKABLE version (PSD) from Tammy's post. I basically know nothing about Photoshop so I had the Printo guy help me. He modified the letters to put in what I wanted. If you know your way around Photoshop, Tammy's post has all the details about fonts and sizes.
I had a couple of different ideas about the wording but eventually went with what I wanted to tell S - "I Love You Today Tomorrow and Always". I got it printed on a 9x12 semi-hard poster sheet. This is how it looked like.


Got it framed in a simple black frame, like Tammy says to make it look more authentic :)  Gifted it to S on our anniversary and he loved it! Though I wish I had used a brighter colour of ribbon to wrap it up.


Thanks Becca and Tammy for sharing this with your readers.
Have a great weekend everyone!!

Update - I am linking this to Patty's Weekend Wrap up 20.


And Show and Tell Wednesdays on Blue Cricket Design

Show and Tell Green

reade more... Résuméabuiyad

Happy Valentines Day: Heart Envelope tutorial

It is that time of the year when all one can see around is pink, red, hearts, flowers and all the mushy stuff that goes with it!
So what did I do for V day? I gifted my hubby a pass to freedom!!! Yay! 
Now don't get your thoughts running. It was just a set of tickets to the India Australia practice match before the ICC World Cup 2011.  This was my way of saying "Go have fun, do your guy thing (Minus the wifey and the kids tagging along)!"
Though S scored points by asking "Where are tickets for you and N?" as soon as he opened the envelope!
I made this valentine(y) envelope and put the tickets inside. The match just happened to be on the day before Vday hence the hearts and all!


Here is a tutorial of how I made the envelope [Warning: Long post] -

My raw material - a sheet of thick black chart paper, fevicol, scissors, ruler, the tickets, some heart shapes to stick on to the envelope.


I used a black rectangular piece of thick chart paper - rectangle to match the size of the tickets. I cut enough lengthwise so that I could fold it 3 times into 3 equal sized parts.


I folded the bottom part to make the base of the envelope. The top part was cut into a triangle shape to make the flap (see picture below)


Thin strips were cut from the sides of the lower-most part so that the middle half could be folded over to seal the edges of the envelope. The sides were then glued with fevicol.


For the hearts, I had some old cards with different sizes, textures and colours of hearts.
 I used some of those hearts directly or to trace on to other material.


One of the hearts was out of this eye mask lying around from N's 2nd birthday. It was red and glossy and matched my requirements.


Voila! The envelope with the hearts glued on top and the tickets went into it!


S liked it and had a great time at the match. He went with a friend who is a great sports enthusiast so it was all the more fun. N and I even got to see them on TV!!
Have a great day and may you all be blessed with lots of love in your lives.

P.S. - I am linking this to the DIY Feb Carnival at The Key Bunch and to Show and Tell Wednesdays at Blue Cricket Design!
reade more... Résuméabuiyad